Relandscaping, Part 3

Be sure you read part 2 before reading this.

At this point, we are ready to order landscaping materials. We shopped around. I got a good price at Living Earth Technology because I was able to use their wholesale prices due to a connection I had with one of their largest customers. (You may be able to get wholesale prices if you just fill out their wholesaler application. Or if you know me and need materials, talk to me. I may be able to get you a discount.)

We ordered 5 cubic yards of compost, 5 cubic yards of azalea soil, and 3 cubic yards of pine bark mulch.

Two of our very generous friends showed up at 8:30 AM on Saturday, Oct. 1. Shortly afterwards, Living Earth’s truck showed up:

Oh, my gosh, I didn’t expect such a big truck!

That huge thing takes up almost all of my driveway:

Here it is dumping out the materials:

Living Earth dumps each material in the dump container, separating them with thick plastic. The driver raises the dump container just enough to dump out the first load. Then he moves forward a bit, raises it further, and empties out the second load:

You’re seeing the pine bark mulch on the ground. In the bed is the azalea soil, and under that, under plastic sheeting, is the compost.

Now all the azalea soil is on the driveway:

Emptying out the final load, compost:

The aftermath:

Left to right: compost (stinking like poop with flies circling all over it), azalea soil, and pine bark mulch.

I am pretty sure they gave us more of each material than we ordered.

First order of the day was to retill the flower bed by the front sidewalk. It turns out we needed to have gone much deeper than we did. Here the dirt has been shoveled out and is waiting for a retill:

I didn’t take many more pictures of the day’s events, but here’s what we did next. We retilling that bed and then tilled in over 3″ of compost. Then we tilled in about 3″ of compost to the second tier of the rest of the front landscaping, and we filled in the bottom tier (the dished out area) with azalea soil. That took us until about 1:30. Here’s the aftermath:

After that, we had lunch and then went into the back yard. We had to completely retill the “easy” part of the back yard beds to get a deep till. Then we added and later tilled in a generous amount of compost:

The above picture was taken at 6:10 PM. Remember that we had been working since 8:30 AM with few breaks! That was a LONG DAY!

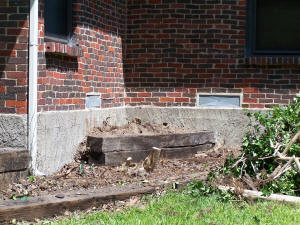
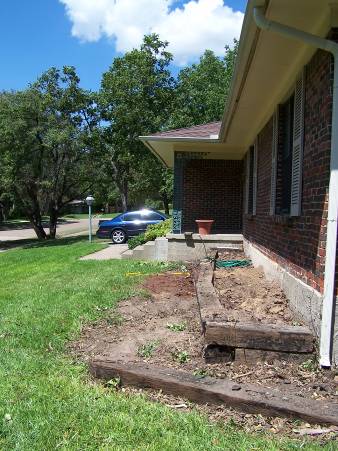
The other side of the back porch was a mess. It had never been tilled right at all, it was full of tree roots, and it has a drainage problem. One of the guys and I spent almost the whole afternoon surgically removing as few roots as we could manage and digging a trench for some 4″ plastic perforated landscaping pipe I am going to use to correct the drainage problem.

Those two guys ended up staying until 8:00 PM. That’s right, almost 12 hours of help in the hot sun. They were beat!

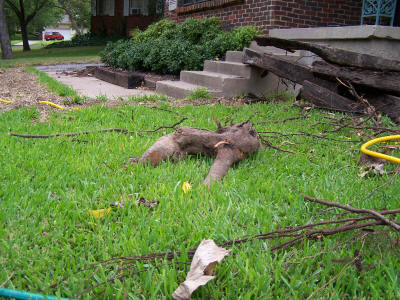
By the way, we had to get rid of the gas lamp. It had rotted out around the base:

It sits waiting to be hauled off:

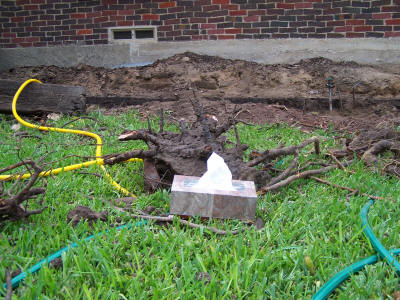
By the way, some people had hypothesized that the reason this lamp didn’t work right was because of a clogged gas line. Nope, the line was fine:

The next day, Sunday, Oct. 2, Jennifer and I spent the afternoon and early evening finishing out everything. We added more compost to beds and mulched almost everything.

I spent more time on the difficult part of the back yard. Here is what I ended up with:

I got it prepped fairly decently, but I stopped because of the tree roots. I have since checked a few web sites and consulted with a respected landscape architect, and I really don’t have much to worry about as long as I limit my cutting to the 3½ foot width of this bed. The tree is a healthy, mature American elm, and I would only be disturbing a small portion of its entire root system. Because we live in a moderately dry area, this tree’s roots probably go at least 10-15 feet deep. If the tree’s root system could be seen as a pie, I am only affecting one small sliver of the pie.

That tree is in the center of this shot:

So this upcoming weekend, I will probably cut out the remaining roots and deeply till and prep the remainder of that bed.

By the way, I discovered what half the drainage problem was:

The gutter was full of leaves, so water couldn’t even get to the downspout.

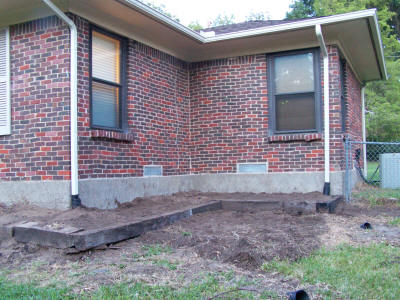
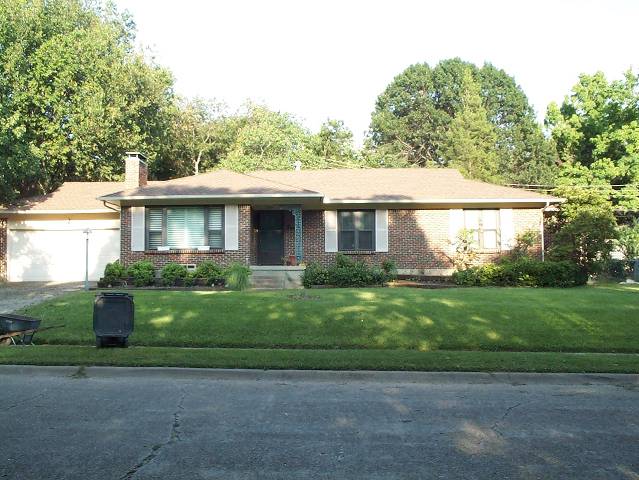
Here’s how everything looks right now.

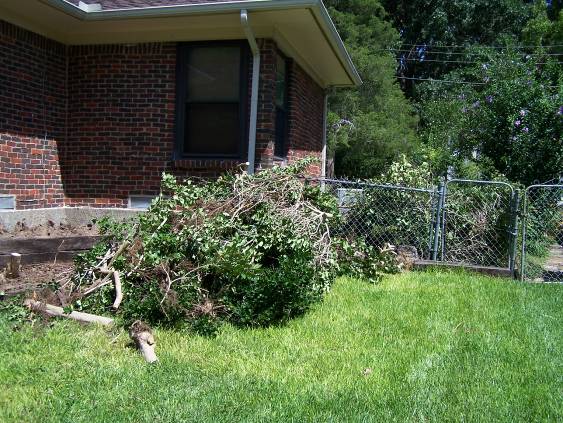
Back yard (the not difficult side):

Nicely mulched and “ready to go” front beds:

More of the same for the front:

One thing I am not sure about is whether this steep of a slope of azalea mix can withstand heavy rains. I may need to add a row of railroad ties across the front.

Our plants come in this weekend! We’re excited!

Relandscaping, Part 2

This is a long-overdue update on our landscaping project. In the last update, I told you about how we are re-landscaping the front yard. We’ve since expanded the project so that we are re-landscaping all the beds around the house. Yup, front and back yards. After we’re done with this project, the only landscaping left will be a hedge around the fence.

The last update was on August 21. At that time, we had just cleared out all the plants in the front landscape, although I still had to spend extra time on a ligustrum stump, visible in front of the two stacked railroad ties:

This is all that was left of a multi-trunked, 15 foot high ligustrum semi-tree. I had to stop because I had been outside all day in the 100+ degree heat, and I uncovered a bunch of fire ants.

Fast forward a few weeks to Sunday, Sept. 18. By this day, I had finally removed the stump. With the help of a friend, we spent another hot Sunday afternoon building up the tiers on that side of the house. The stump is gone, and we have a bed that completely wraps around the front of the house:

(By the way, notice the warm light from the window? You wouldn’t get this with a normal daylight picture. This is a 1 second exposure time, 400 ISO shot I took at 6:43 PM on 9/21/05. It was too dark to take pictures except under this special mode.)

If you looked carefully, you’ll also notice that we buried the gutter outflows underground. They now drain into the lawn. I still need to finish this off with a better water distribution system, but for now this keeps the water away from the beds.

Now jump to Saturday, Sept. 24, the day that Hurricane Rita was menacing east Texas. Rita gave me a great 10-15 MPH breeze to keep the temperatures down but no rain! Oh, well, the lack of rain gave me another day to work on the cherry laurel tree roots. I pulled out more large stump pieces:

(Box of facial tissues provided to get a reference on the stump’s size.)


They may not seem like much, but when all you have is shovels and a Sawzall, ripping out these stumps is a major achievement.

I also noticed where cherry laurel roots grew between the stacked railroad ties, so off came two sections of railroad tie!

Front Yard Re-Landscaping Is Underway

When we moved into our house, we resolved to clean up the landscaping. All our neighbors tell us that we’re the first people in about 15 years to do anything productive with this house’s landscape, so this is a welcome relief for my block.

This is what we started with when we moved in almost two years ago:

Well, this is after I cleaned up the stuff under those windows on the left side. The nandinas directly under the windows had badly overgrown their place and caused the hollies in front to lean forward. Four months after moving in, I hacked back the nandinas and topped the hollies. You also see a silver maple trash tree in front of the front door, and a nice but badly overgrown Carolina cherry laurel tree terrorizing the landscape behind and to the right of the trash tree.

Last summer, I removed the silver maple:

Later that summer, we had a company remove 11 more trees from the property. They were 10 trash trees in the back yard and the laurel cherry. Here is the aftermath:

Now you’re starting to see some of the house.

That left us with a cluttered assortment of hollies, an overgrown ligustrum, a few worn out nandinas, and two sparse crepe myrtles:

It all had to go.

Fast forward to yesterday (Saturday). Two determined homeowners + Sawzall + shovels + 101° heat + 4½ hours = barren landscape:

(Man, I wish that blue car was my Nova!) Yup, it’s all gone. The debris is sitting in our side yard until heavy trash pickup time:

This job was made much easier by the Sawzall I got a few weeks ago:

Well, that and an 9” wood cutting blade:

Roots? No problem. Just plunge the blade into the ground and cut in a circle around the plant. After the cut, pluck the plant straight out. It almost looks as nice as if the plant came out of a nursery pot. Then rip the remaining roots out of the ground mostly by hand.

I couldn’t fully handle the ligustrum on Saturday. The roots are mostly shallow and easy to handle, but the stump is a pain. Plus I disturbed a fire ant colony. I will have to come back to that later this week, armed with the Sawzall and a shovel.

I went through three of the 9” blades through the course of the day. Cutting stuff in dirt really dulls those blades really quickly.

We had hoped to save the crepe myrtles and put them somewhere else. Unfortunately, these crepe myrtles sent their roots straight down to the lower tier of the front landscape. They were planted directly below the eave, so they never got direct rainwater. Their roots had to go down and out to find water. Because of that, I was not able to cut in a way that allowed me to just pluck them out with the key roots intact. I had to break them apart and rip them out.

We still have a lot of work to do before we can plant the new landscaping:

We’re looking forward to more work in upcoming weekends! Hopefully this will be finished before winter.

Sodded the Back Yard

For about 12 grueling hours, two in-laws, my wife, and I sodded the back yard with Palmetto St. Augustine grass.

At 7:45 AM Miller Grass delivered six pallets of sod. Each pallet is 63 square yards, or 567 square feet. Six pallets are a whopping 3402 square feet!

Our Palmetto pallets are the rearmost ones on this truck:

Here’s what the yard looked like before we started (click on it for a larger version):

Notice the playground area and other junk on the yard.

Here is a progress check at around 2:00 PM:

Did you notice that the playground area is gone?

As we got through the first pallet, I noticed that it covered disturbingly high percentage of the yard. I freaked out and estimated that I somehow bought 50% more sod than needed.

We took a careful look at this playground area and decided to just rip it out and grass it over. The equipment was decrepit anyway, and the playground area’s mulch was mostly worn out and eaten up. All the junk on the right side of the yard is from this playground area.

Even after making this decision, I was still concerned that we would be left with two unused grass pallets. I called Miller Grass and asked if they would buy back the two pallets, but they were understandably not interested. Sod is like take out food. Once the food is prepared for you and it’s in your possession, you can’t just take it back. Miller Grass referred me to a landscaper who needed two pallets of grass for Sunday. I called the landscaper, and he offered me 50% of my cost for the grass.

Fast forward to 6:30 PM:

We’re done, and better yet we used every last piece of grass! The landscaper didn’t get to buy a thing.

My original plan was to solid sod a third of the yard, checkerboard sod another third (the area already had some grass), and leave the rest alone (the remainder had healthy St. Augustine or was the play area). Well, it turns out that after sodding the playground area, we had exactly enough grass to solid sod the entire yard, not including the area with healthy St. Augustine. What incredible luck! For a price that I thought would give me enough to halfway finish the yard–and leave a trashy “playground” in the middle of it–I now have a stunning back yard. The difference between before and after is astounding!

The thing that I am most proud of is that I personally unloaded at least a third of the grass from the pallets into the back yard. It was one of the most difficult jobs I have ever done, and I am exhausted. But considering that 3½ weeks ago I was in the emergency room after a bad crash, this is a major accomplishment.

By the way, that grass stunk of cow manure.

Grassing up the back yard

When we bought our house, we inherited a mess of a back yard. A third of it was overgrown with periwinkle, a fifth had neglected St. Augustine grass, and the rest was just trashy, weedy grass. The flower beds were almost bare and compacted by constant beating of 3 dogs, there are metal parts everywhere (from a nutty guy who lived here for a few decades), the yard was full of trash trees, dirt was piling up against the bricks, and so on.

This Saturday we are correcting the grass problems: we are sodding 3000 sq ft of the former periwinkle and trash grass areas of our back yard.

To prepare, a few weeks ago we killed off the periwinkle with Ortho glyphosate, and this Sunday I shaved the trash grass with my mower’s lowest setting.

There are two variants of St. Augustine grass commonly sold in the Dallas area: Raleigh and Palmetto. Both varieties are resistant to St. Augustine decline virus. The Palmetto variety has several superior characteristics to the Raleigh, one of which is possible enhanced drought tolerance because of an apparently deeper root system. It also has a better appearance and is more cold and damage resistant. Since it’s only 10% more expensive, we chose the Palmetto variety. We are using Miller Grass, a local sod supplier.

Last night we got 320 lbs of topsoil from our local Lowe’s, and today we got another 800 lbs. We are using this to raise a depressed area of the back yard and enhance water flow away from the house.

After you lay the sod, you have to keep it thoroughly wet for at least two weeks. Dallas has an ordinance restricting watering between 10 AM and 6 PM from June 1 through Sept. 30. I filed for a variance from Dallas’s water regulations today; hopefully they will respond quickly!