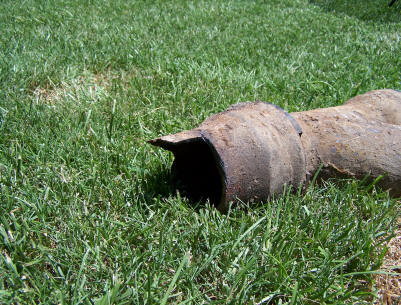
Today I have mostly finished the biggest single project I have ever done at my house. I replaced about 3 feet of iron sewer pipe.
It all started on Wednesday, June 22, the night before I left for the 7th Annual Nova Listserv Gathering in Amarillo. (Ironically, this problem happened just a few weeks after the prior major sewer malfunction, which happened the night before I was to leave for a different trip!) My wife told me that the shower stopped up, but the toilets eventually flushed. Since everything drained back out eventually, I thought this was just another occasional backup that cleared itself up.
No such luck. That night, while the washing machine was emptying, sewer water crept into both the shower and the bathtub. Not good!
I went outside and pulled off the sewer cleanout cap. Unlike last time, no water shot up at me. This means that there is a blockage under the house. This is mostly good because it means the expensive-to-replace main sewer line–the one that runs through my back yard–was working fine.
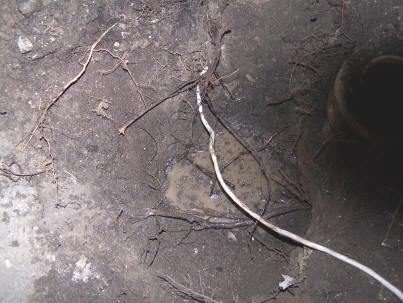
Peering down into the cleanout, I noticed something funny at the very bottom:

You can barely make it out in this picture, but at the bottom of the cleanout is a root tendril or two. So I jammed my arm down the cleanout (it’s only about 1½ feet deep) and was able to feel a lot more roots just upstream of the cleanout.
I got out my spade shovel and started digging. About 30 minutes later, I hit the sewer pipe. As soon as I hit it, sewer water backed into the hole:
I felt around and found the pipe. I felt a large hole in the top of the pipe. Feeling around more, I could feel a huge mass of roots. I worked on the roots for about 30 minutes with my hands and with the saw blade on my pocket knife, but I couldn’t budge a single root! I also tried snaking a 14/3 Romex wire into the mess, hoping I could dislodge it. No such luck. I got the wire to poke through the roots, but when I pulled the wire back out, the roots seemed to have collapsed back in on themselves because no more water flowed. (I could watch down the cleanout pipe to see if any water was flowing.) These roots were packed in very tightly. It’s a wonder that anything ever flowed down that pipe!
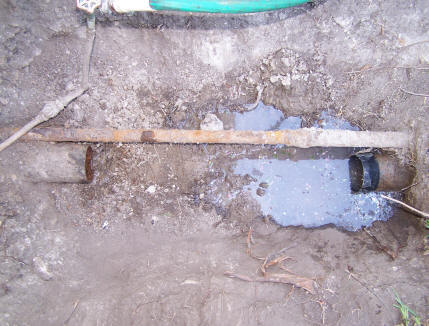
I dug around some more to get better access, and in the process I found an old, rusty file. I salvaged the file, dug it into the roots, and leveraged it against the edge of the pipe opening. By doing that, I finally was able to rip the roots out:

You can see the hole just upstream of the cleanout (it’s about 1½ feet lower than the top of the cleanout), and the rusty file is laying in the dirt just to the left of the hole. The water drained out of the hole by this point, so I obviously cleared out the obstruction.
At this point, I had almost spent about 1½ hours on this job. I needed to pack for the Nova trip, so I called it a night. I left the pipe like this until I got back.
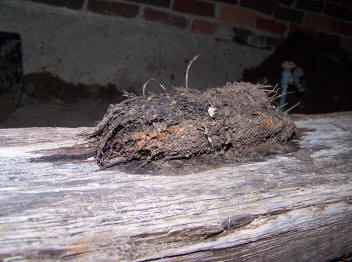
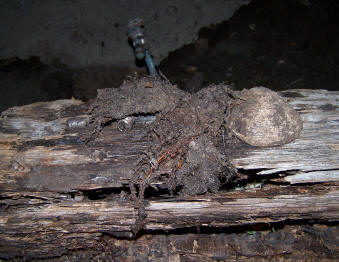
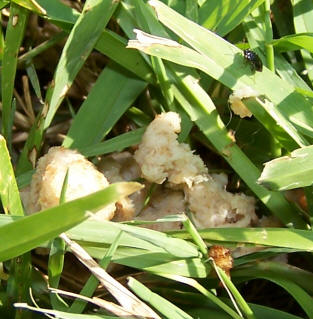
Here are some of the amazingly thick roots:
Here’s a closer look at the hole:
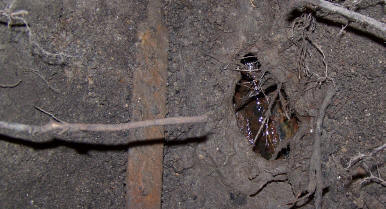
That’s the file to the left. The hole was a root magnet!
Later investigation shows that the roots almost certainly came from a taproot from the redbud tree in the middle of my back yard (panoramic picture).
I spent a portion of 3 nights over the following week digging up the area. Here’s where I ended up Saturday morning:
Now I have almost full access to the area. That’s my house’s old gas line running adjacent to the sewer line. The gas line was replaced a few years ago, and the replacement was run to a foundation vent about 10 feet away from this point.
The hole expanded:
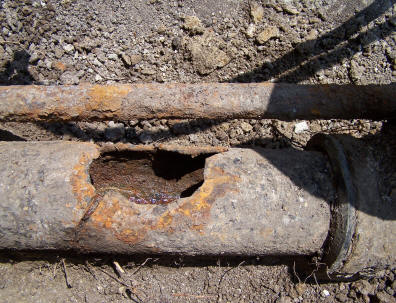
I later discovered that this hole was just part of a large crack that went the entire circumference of the pipe.
A neighbor kindly let me borrow his reciprocating saw. (The common name brand is Milwaukee Sawzall.) Here is the first cut:
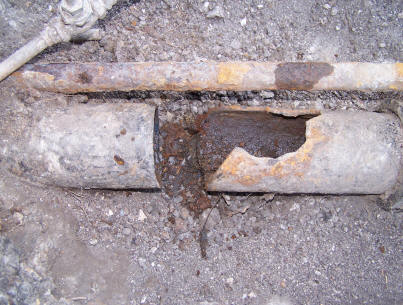
Notice the clean cut on the left and the jagged edge on the right. This is why I believe the pipe was cracked/rotted all the way through at this point.
By the way, it took me about 30 to 45 minutes to make each complete cut through this pipe. From this cutting, I learned a few lessons on cutting sewer pipes with a reciprocating saw:
- Use the right blade. I started out with the blades that the neighbor gave me. They were 24 tooth per inch blades that were designed to cut through metal up to 1/8″ thick. I chewed through those blades way too quickly. (I gave him a whole new package of those blades when I returned his saw.) I later got 14 tooth per inch blades that were for metal 1/8″ to to 1/4″. Those made it go a little quicker, but I hear that there are still better blades out there.
- Go slow. This reciprocating saw had two speeds: fast and faster. I think both speeds were probably too fast for the job. I may have sped up the job if I had a saw with more speeds or a variable speed trigger. Because of the high speeds, the blades got too hot and quickly dulled.
- Use water or lubricant. Water or lubricant can help keep down temperatures and lengthen a blade’s life.
A guy I know who has a lot of experience doing this says that with an even better blade and slower speed, I could have cut through that pipe in 2 minutes tops. That’s a dramatic difference from 45 minutes! Unfortunately, I never realized this and spent way too long on each cut.
After another cut, I got the whole piece out:
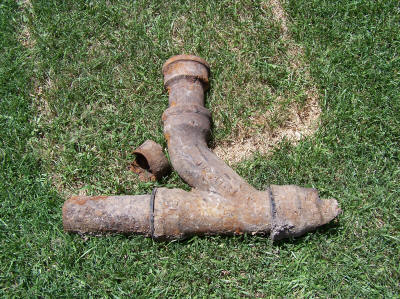
Notice the not so nice edge on the cut on the right side? Let’s take a closer look:
The weight of the whole pipe assembly caused it to rotate and snap off, taking a sizable chunk of pipe with it. Because of this, I had to make a third cut so that I could mate pipe up with a flat edge.
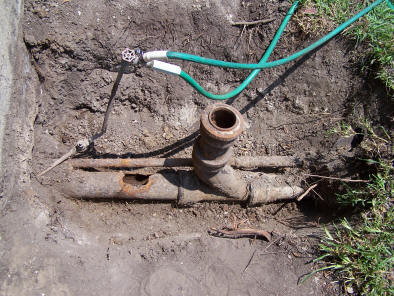
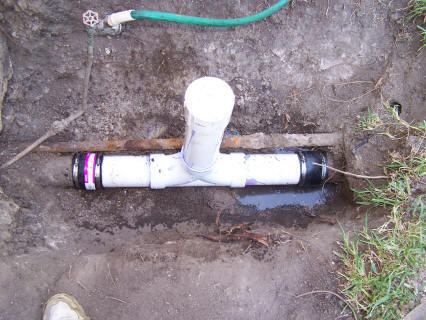
This is what I accomplished before I turned in for the night:
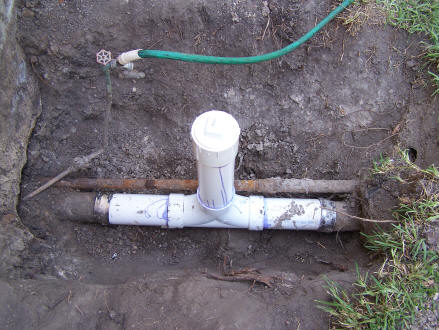
(I took this picture the following morning.) You’re seeing 4″ schedule 40 PVC pipe, a 2-way cleanout, and two fittings to mate the PVC to the iron pipe. Since I had to dig everything out anyway, I elected to replace the existing cleanout. You may have noticed that the previous cleanout only went one way: away from the house. If a plumber needs to auger under my house, he has to get on the roof and go down the roof vent. All four plumbers I have dealt with charge significantly more to go on the roof, mainly due to the extra liability. Installing this 2-way cleanout is a huge cost savings.
This worked great except the fitting on the part away from the house leaked. Here’s a closeup:
You can see that the pipe fits funny, and the coupling just doesn’t cut the mustard.
After church (where I was first exposed to the concept of “fundamentalist heresy”–I don’t like fundamentalism, but it had never before occurred to me that fundamentalism is a heresy), we stopped by Home Depot, where I got better fittings.
Back out it goes. In pulling it out, the side of the sewer that goes to the city sewer dumped its contents in my pit. You’re seeing chopped up strawberry greens in the water:
This part of the pipe has a natural sag, meaning that it collects water. I can’t blame a 53 year old pipe from sagging a bit! So when you pull out the new fitting, a little water comes out. This isn’t a problem “per se” as it doesn’t really reduce the capacity of my sewer line; it’s just an indication that some settlement has occurred over time.
Here’s the assembly back in place with the new couplers:
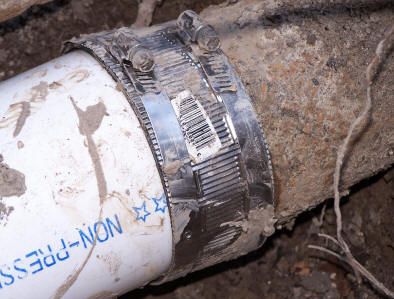
This is what the coupler looks like up close:
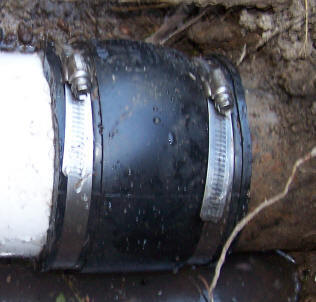
It’s two hose clamps around a much thicker, much longer rubber piece. You tighten each hose clamp to 60 in/lbs, a pretty light load.
At this point, I am done with the sewer part. But I still have an elective repair to make. (Can we say “scope creep”?)
You may have noticed this spindly old water line running to a hose bibb:
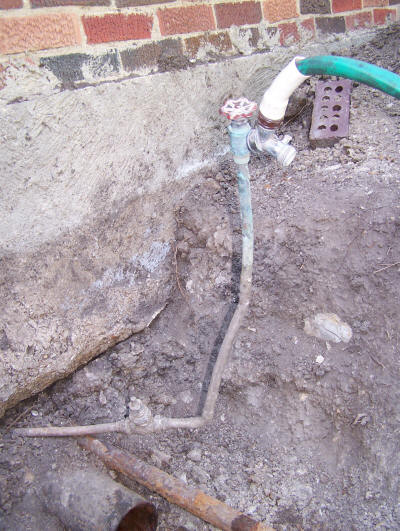
Shortly after I moved in, I accidentally bent it down almost flat to the ground. By the looks of that pipe, I wasn’t the first person do to that. Additionally, about ½ foot from where it comes out from under the foundation is an old style cutoff valve, just waiting to start leaking. This whole thing had to go.
I replaced it with new copper, eliminated that cutoff valve (a later visual inspection showed it was partially shut, restricting water flow), and used a quarter turn full port ball valve. Here’s what I ended up with:
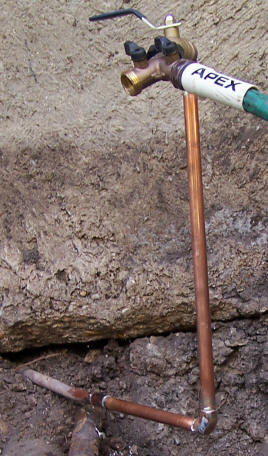
This is a far superior setup, and it doesn’t stick out of the ground almost a whole foot like the previous one. That quarter turn valve is so easy to turn compared to that leaky old gate valve!
When I was soldering this to the house’s pipe, I had a problem with water entering the pipe. Water siphons off heat, so there was no way for me to build up enough heat to solder. I had to use the old plumber’s trick of stuffing bread up the pipe to stop the water flow. That did the trick! This is what that union ended up looking like:
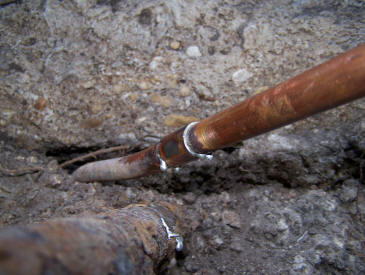
I screwed in the hose bibb into a 90 degree brass fitting that I sweat soldered directly into the copper:

Here’s the bread after it got ejected from the hose:
Yum!
So far nothing’s leaking. As long as everything stays dry for a day or two, I’m filling in the hole.