Yesterday, my father-in-law and I spent 12½ hours replacing my water heater.
Our water heater was old. My house’s previous owners did not report changing the water heater on their house condition form. Given their move in date and the apparent date code on the water heater, it was at least 14 years old.
It was showing its age. It couldn’t keep up with a 10 minute shower using a 2.5 gallon per minute shower head. I figure that the dip tube may have gone out or the heat transfer was exceptionally poor.
Fortunately this old heater had not leaked yet.
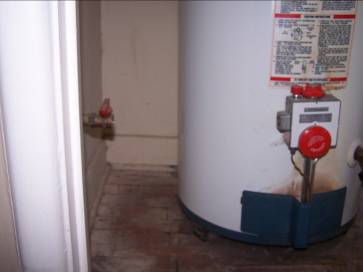
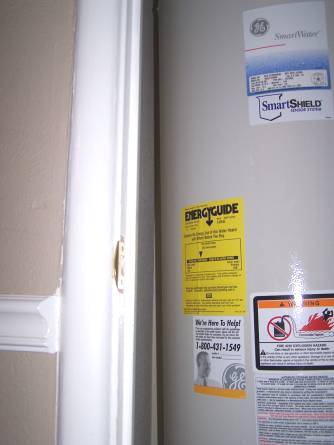
Here is that old piece of garbage:
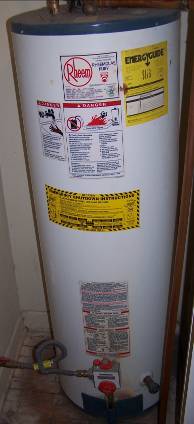
In a recent article, Consumer Reports cut open several water heaters and found that, in general, the longer the warranty term, the higher quality the water heater. For gas heaters, a longer warranty means “bigger burners and better heat transfer for faster water heating, along with more anode material and thicker insulation.” The width of our old heater suggests that it may have just been a 6 or 9 year warranty version, so it was probably on borrowed time before we moved in.
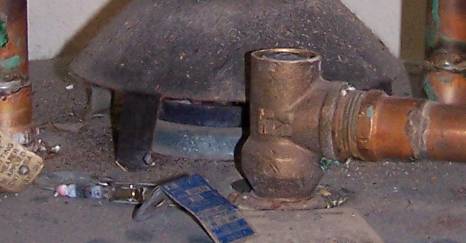
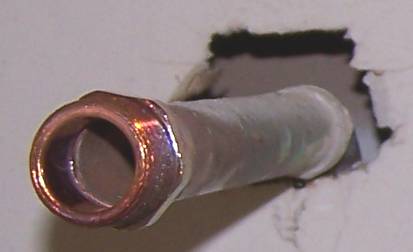
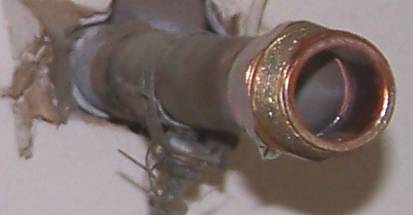
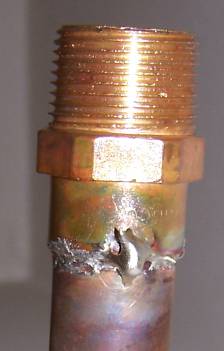
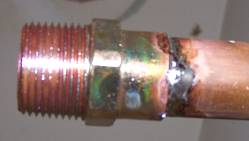
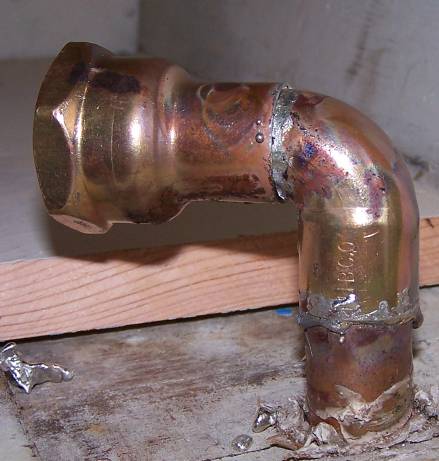
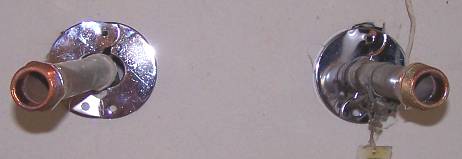
Not only is this heater “old and busted,” whoever installed it was a complete moron. Look carefully at the hot water connection:

This is where the installer sweat soldered a ¾” pipe into a ¾” female threaded adapter. The excess solder sitting around the place makes it look like the soldering happened after the adapter was screwed in. The same thing happened on the cold water line. If this is the case, then the nipples that this female copper piece screws into also got extremely hot. What’s on the other side of the nipple on the cold water inlet? The plastic dip tube. What happens to plastic dip tubes when they get extremely lot? Premature failure. So this water heater could have been “damaged goods” for years.
Back to the story.
On Friday night we pre-purchased a 40 gallon 9 year warranty Whirlpool natural gas water heater from my nearest Lowe’s. Lowe’s did not sell a 12 year warranty 40 gallon natural gas water heater.
Side note: of all the water heaters Consumer Reports tested, the only oddity it found was with the Whirlpool 40 gallon ones. CR reported that the 40 gallon 9 and 12 year water heaters’ internal stuff was identical, suggesting you don’t get a better heater by buying the Whirlpool 12 year unit.
On Saturday morning I stopped by a Home Depot and found that an equivalent water heater is $40 cheaper. Lowe’s refused to price match—even though the product was equivalent, it wasn’t the same brand—so I canceled my Lowe’s order. In the end I got a 12 year warranty 40 gallon GE water heater for only $21 more than Lowe’s 9 year version.
I feel better about the GE water heater anyway. Unlike Whirlpool, GE actually mentions water heaters on its site, suggesting they want to be associated with their product. The GE may really be a Rheem unit, the same brand that I have right now.
Getting the water heater was a fiasco. My father-in-law and I had to go to two Home Depots before we found the one I needed. Then when we got there, we spent about an hour figuring out the right parts to hook up a drain line to my drain pan. More on that later.
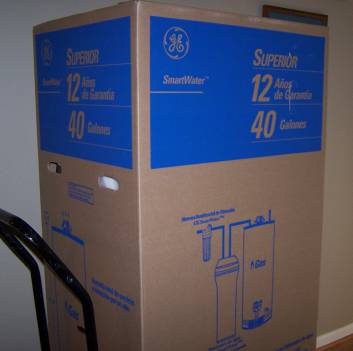
Here I am wheeling the new heater into the house:

It’s “ Superior ”. Oooh, aaah.
Next we drained the old heater:
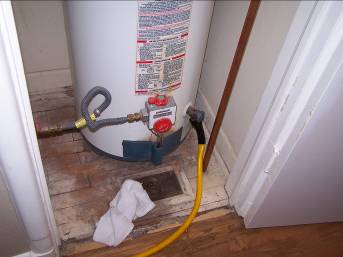
This was way fun. I drained this water heater over a year ago without a problem. This time the heater would not drain even though I had hot water valves open in the adjacent bathroom. If I opened the water heater’s cold water inlet valve, the pressure would force water through the hose just fine. But when I shut off the cold water valve, it quit flowing. I even drained the entire house water system and reopened the cold water inlet. That didn’t work. I finally messed with the temperature and pressure (T&P) release valve. It came apart, allowing air to enter the tank and defeating the vacuum. Eureka ! 10 minutes later and I have an empty water heater.
It turns out that there may have been a check ball in the hot water nipple. That would prevent hot water from back-flowing into the heater.
Here’s the T&P valve ripped apart with its guts off to the left:
Next we cut the copper lines on top and disconnected the gas line:
The water heater wheeled out effortlessly with a dolly. Here’s the aftermath:
That’s the T&P drain line to the right. The chimney was taken down and put to the left.
The floor was a mess!
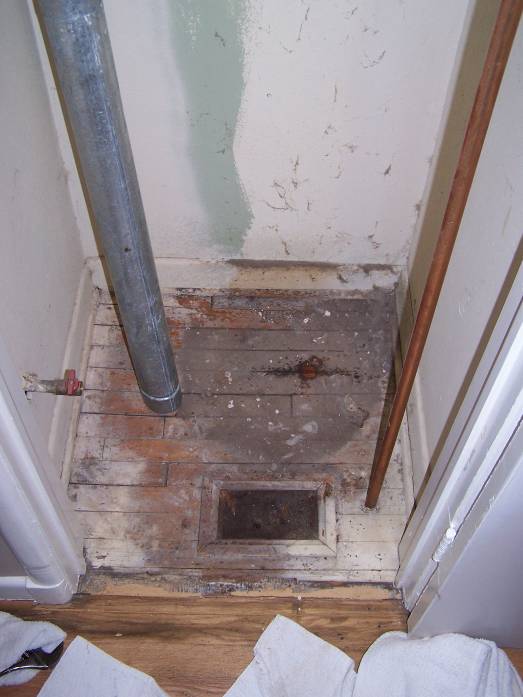
All that gray stuff is dust. Knowing I wouldn’t have access to this area again, I thoroughly vacuumed the floor and wall.
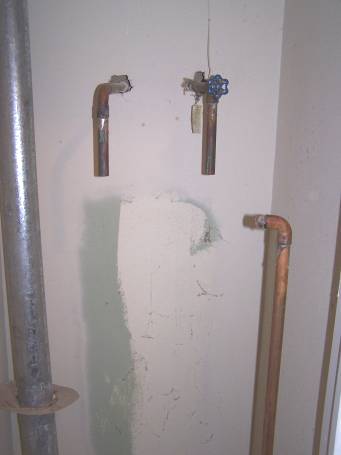
Next I cut off the 90° bend from the hot water line and the valve from the cold water line:
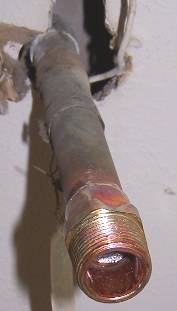
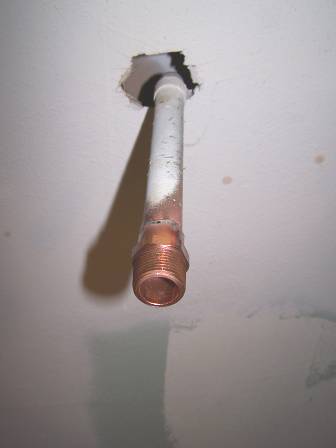
Then I prepped these lines with some fine sandpaper and flux and sweat soldered ¾” copper to male adapters:
Look carefully and you can see where capillary action pulled the solder through the fitting. They show up as those bright spots on the seam where the supply pipe bottoms out in the fitting.
Even though I only had a propane torch, the sweat soldering went fine. It just took a little while to heat up the pipe.
Here are some more views of the sweat solders:
This is the bottom of one of the fittings.
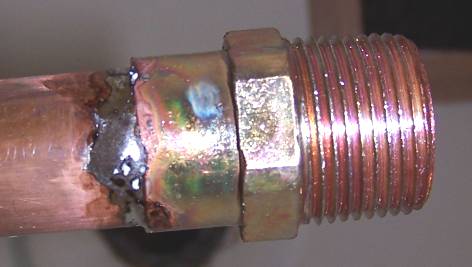
This is the bottom of the other fitting. You can barely make out where my sanding ended and where solder pooled up.
The pipes just goes to a 90 degree fitting and then drops down through the wall to connect to other pipes in the crawl space. It’s not secured very well.
Whoever re-plumbed the house 20 or so years ago did a mediocre job on the plumbing. That’s why I had such a fun time with my shower a few weeks ago.
This may not have been apparent in the earlier picture, but the flooring under the heater was warped. I think that the pre-1991 water heater back could have had a huge water leak. Fortunately we had extra 12×1 lumber in the garage, apparently an old closet shelf. After a few measurements and cuts with a circular saw, we have a makeshift, semi-level floor:
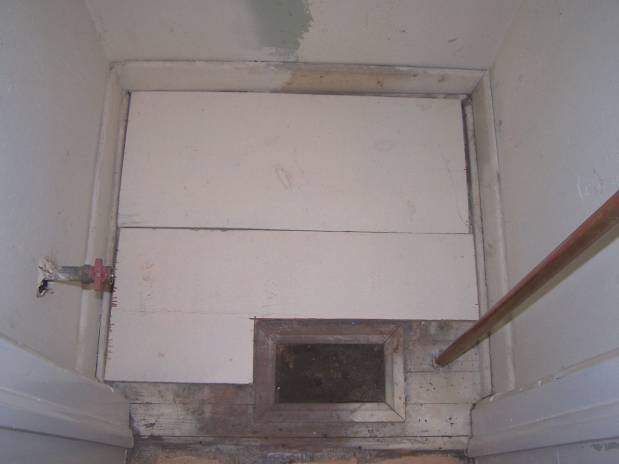
A reasonably level floor was important. These days you need to put a pan below your water heater. That’s a smart thing: if the heater has a small leak, you have something to contain and carry away the water instead of damaging your house. The pan is made out of aluminum, and the water heater’s weight may have bent the pan pretty badly had I put it directly on the warped floor.
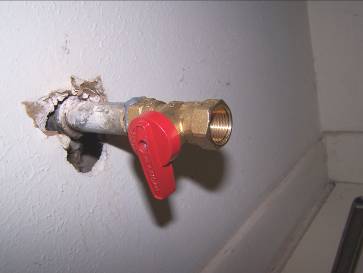
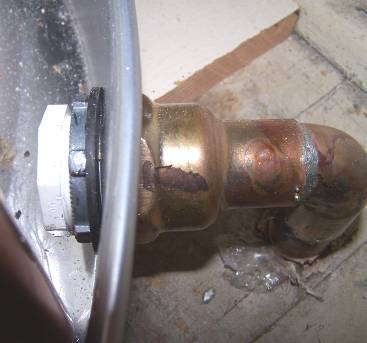
Next we threw a new valve on the gas line:
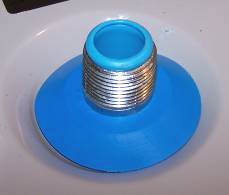
Remember the T&P relief valve line? That line is ¾” copper that runs to the outside. I wanted to use that line for the pan drain, with the T&P valve of the new heater just draining into the pan. (This is apparently standard now.) The drain pan came with a 1” male PCV adapter like this: 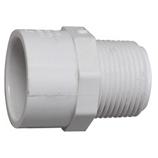 It also included a large rubber washer and large metal nut. The drain pan has a cutout that the threaded end of this PCV part fits through, and the rubber washer and nut tighten against the cutout to make a water-tight connection.
As mentioned earlier, my father-in-law and I spent about an hour at the Home Depot scratching our heads trying to figure out how to connect the drain pan to this ¾” copper line. It wasn’t easy because we had to go from PCV to copper and also do a sudden 90 degree turn into this line, and it all had to be done in a very short distance. The best that Home Depot staff could recommend was some kind of compression fitting that they didn’t carry. Eventually we stumbled across this solution, which worked very well:
What you see is, from bottom to top, is the stub of the T&P valve drain line (I cut it off about 2” above the floor), a 90° street ¾” copper fitting, and a 1” female threaded to ¾” female sweat copper reducer. We also found a piece that’s like the PCV adapter pictured above but without the long, smooth part to the left of the threads. This helped us with water heater clearance. Here’s a picture of the final assembly:
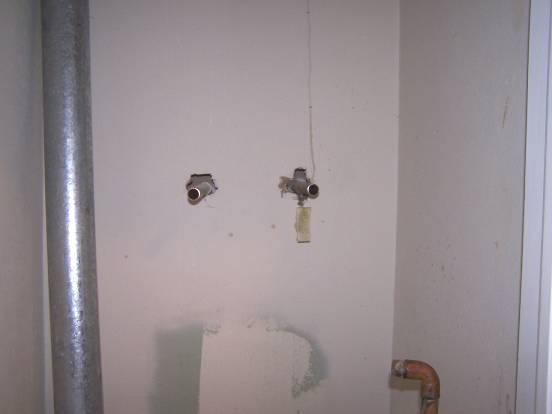
I thought we would pretty things up a bit and cover holes on the wall with flanges:
This can prevent bugs from getting inside.
Unfortunately I didn’t take pictures for the next few scenes. We put the drain pan in place and then got the water heater situated. Manhandling the water heater into the closet was an adventure. The closet opening was only 2” wider than the water heater, and we had to lift the unit up high enough to clear the pan. Fortunately the water heater was shipped on a cardboard base that was approximately the same height as the drain pan. We slid the heater on the base up to the drain pan and carefully rocked and rotated it up and over into the pan. It took about 15 minutes for us to figure this out and do it. Once the heater was in the pan, further positioning was easy.
Given how difficult that was, I am very glad we chose against a 50 gallon water heater. We almost thought about doing it. The 50 gallon unit was only ¼” narrower than the closet and taller.
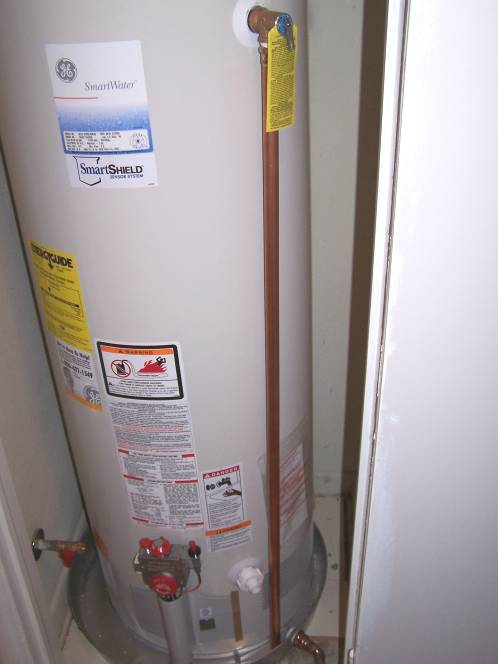
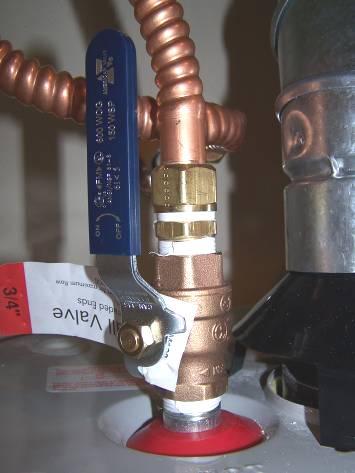
Here’s a later picture with the heater hooked up to the water lines:
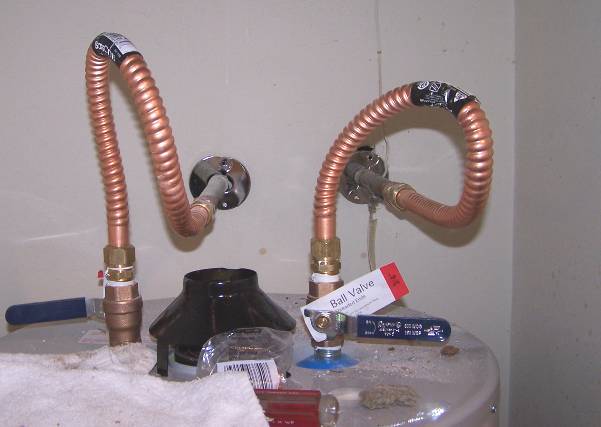
I put 600 PSI forged brass ball valves on top of the dielectric nipples. Then I used male-to-male couplers to hook up those flexible copper lines that run from the house plumbing to the water heater. Man, those flexible lines make me nervous. Instinctually, flexible stuff shouldn’t be on a critical part of the house’s plumbing!
Notice a problem with the above picture? Hint: where’s the chimney gonna go?
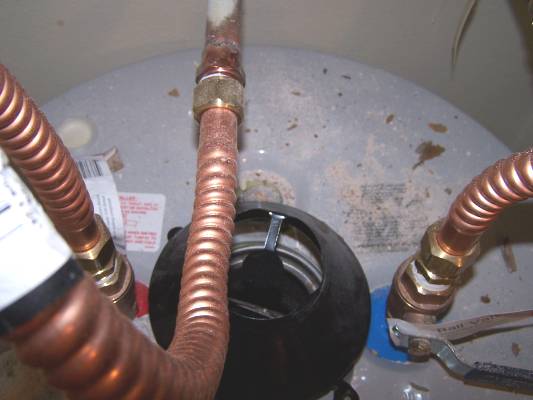
Oh, no! The hot water line blocks the chimney! If that’s not bad enough, we also discovered that the new water heater’s chimney is not in the same position as the old heater’s chimney. Another Home Depot trip!
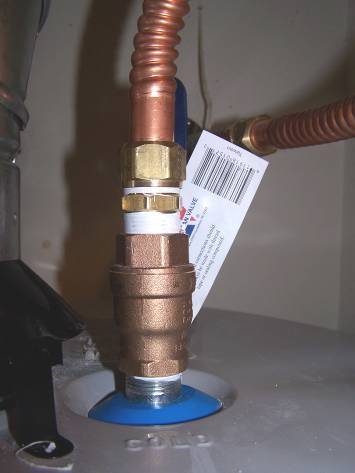
An hour and a half later, I cut the hot water pipe back and installed a new male threaded fitting:
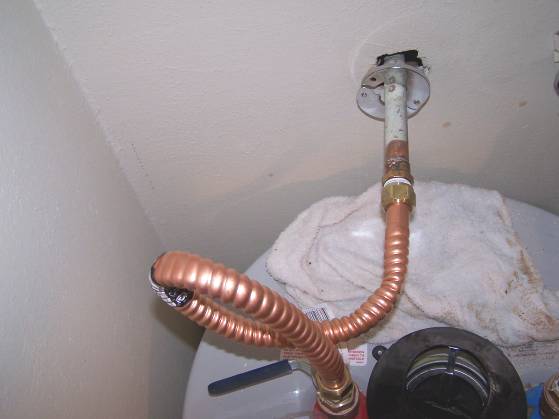
This clears the chimney great. That’s a wet rag below the pipe. It insulates the heater from my torch and catches solder.
The new chimney fits perfectly:
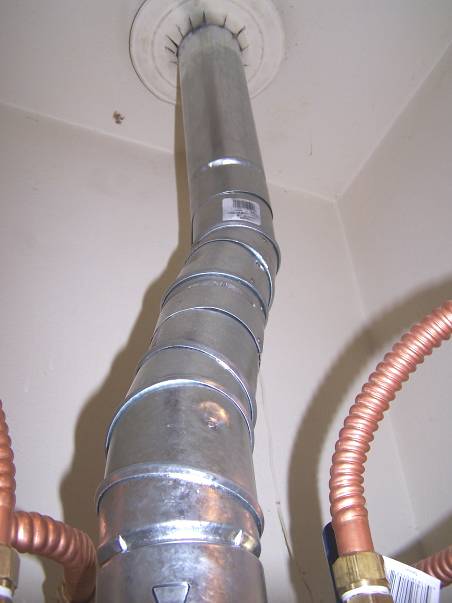
We made sure the new chimney is the same ultimate height as the old one. The old chimney was a 5’ piece and a 3’ piece. The new chimney is two 3’ sections and two 1’ flexible sections. The old water heater was 3½” shorter than the new one, but the bends in those two 1’ flexible sections took out about 2”, so it was close enough.
I also installed a long copper pipe from the T&P relief valve to the drain pan:
Take a closer look at the gas valve on the above picture. Notice how close it is to the heater? The flexible gas hose won’t fit. So when we went back to Home Depot, we got a 90 degree black steel ½” elbow. Now the valve mostly faces up:
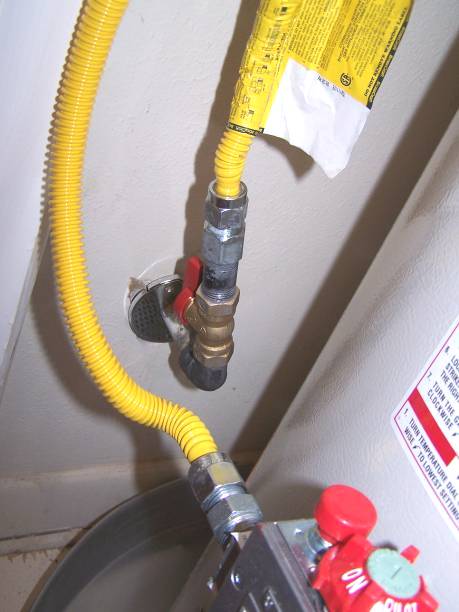
We cranked the black steel pretty tight and used plenty of pipe dope.
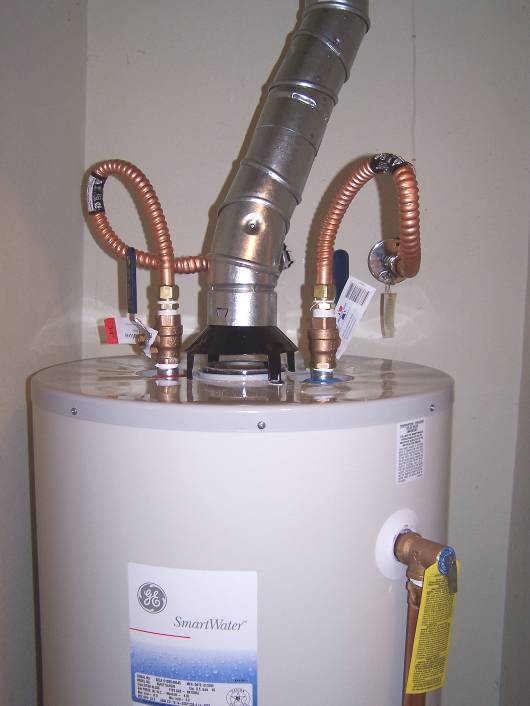
Everything’s ready for action!
We thought we were done, but we found several small leaks in the brass fittings. I cranked down those fittings tighter than I thought brass should be cranked. With a 12” adjustable wrench, I was really pulling hard at one point. But they still leaked. A quick call to a contractor in Oregon (a member of my Nova listserv) cleared it up. I wrapped one layer of Teflon tape around all the fittings, but he says I should have used 3-4 layers. All my life I had just wrapped one layer of Teflon around fittings. Until now the only Teflon I had really ever used was for fittings on my old Chevrolet Nova’s cooling system, which at most had 16 PSI of pressure. Municipal water pressure is a few multiples of that.
I took all the fittings off, re-taped them with 4 layers of Teflon, and put the system back together. I ended up with one very slow leak, and I corrected that leak with a little more tightening. Here are the fittings after the re-Tefloning:
Next we turned on the gas and leak tested with our noses and with soapy water. We found no leaks.
Next I lit the heater. I had to hold down the red pilot button for a while to let gas flow through the line. The pilot lit perfectly. Here is a picture of the flames taken through the peep hole:
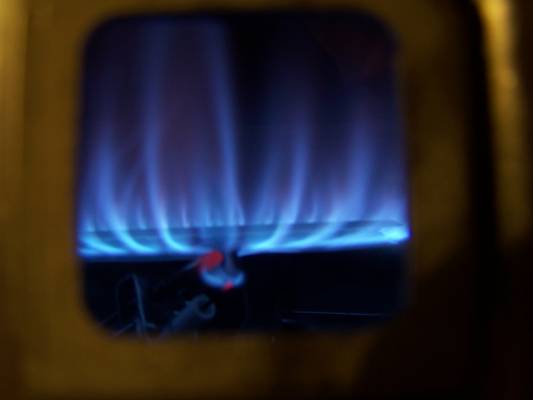
The red hot part is probably the ceramic part around the igniter. I kept the camera’s shutter open for 0.6 seconds to get this.
After we got it lit and let the burner fire up, we heard tapping sounds and noticed an orangish flame. The manual explained it: cold water entering the heater caused condensation. The orange flame and tapping was from water drops falling onto the burner. The tapping stopped within 10 minutes.
This water heater’s dielectric nipples seem cheap:
Inside this is a little rubber flap and no moving parts. Contrast this to my previous heater which completely blocked back-flowing; its nipples may have had a check ball. Already I can feel that the cold water inlet line gets hot as the hot water naturally migrates out. Hopefully this won’t cause too much heat loss.
Other than that issue, I am satisfied with the new water heater. I didn’t have to repeatedly adjust the faucets during today’s shower. It also runs a lot quieter than the previous one. Hopefully this new unit will cut down on our gas bills.
I am pleased to report that I am typing this blog entry a full trouble-free day after the installation.
I am not sure whether I need to correct this later, but the heater leans just slightly:
This picture exaggerates the lean. I will probably correct this with some wood or plastic shims.
One final point: note carefully my wording. Not once did I type “hot water heater.” Water heaters heat cold water, not hot water. It would be technically correct to say “cold water heater,” but I just say “water heater.”
UPDATE: We spent $513.12 on this whole heater replacement. That is more than $300 less than a quoted replacement price, and we got a much better water heater out of the deal.
What a wonderful letter. I am thinking of buying the same water heater. Do you know if it has 1-inch of insulation or two-inches?
I am not sure. Would I have to open it up to see?
I recall that Consumer Reports found that you get more insulation when you go up on warranty length except the Whirlpool 9 and 12 year warranty units had the same amount.
I know this was 2005 but,
your down tube from the T&P valve should NOT be clear down into the drain pan. It has the potential to suck water back up, not allowed by most city codes. I am installing a water heater now and just reading up on installations. THANKS FOR THE DETAILED BLOG HERE, by the way. The drain tube should terminate 6 inches above the drain pan or even 6″ above the drain in the basement if it goes directly to it.
Thanks for the heads up! Wow, it’s already been 8 years!?
Is is still leaning and working fine? I just replace a part in mine and now it’s leaning to the right. I think we damaged it’s stand or something while moving it back and forth… I’m just wondering if I should worry too much about the leaning. Thanks!
Yes, still leaning, and still working fine.
Saw your pics and detailed account. Nice work! I did notice that there’s no “dirt leg” below the gas valve piping you installed. any cause for concern, or is there one behind the wall?
You mean drip leg? If so, I’ve never seen them on the outside of finished walls in Texas.
Did you use flux on your soldered joints? It looks as though it wasn’t used, or it wasn’t applied to both components, male and female. Or perhaps there was some contaminant or oxidation present. Joints should be shiny and free of contaminants, then a thin coating of flux applied to the inside of the female pipe and outside of the male pipe. Also, your hot and cold ball valves should have been attached where the pipes exit the wall. As it is, if any of the joints between the cold and hot inlets leak, you will have to shut the water off to the whole house in order to fix it. This would apply to switching out a new water heater when this one needs to be replaced. I suspect that the ball joints will last longer, too, the farther away they are from the heat source (the water heater). Ball joints contain nylon components. (The old installation had the cold water valve in the correct location. A hot water valve isn’t necessary.)
Great article Aren. FYI; I replaced my water heater 2 weeks ago. It was a 40 gal Rheem (9 yr.model) purchased from Home Depot for $475. I called for an estimate to have HD install…they wanted $1140! I did they same as you…the “father-in-law” route….way cheaper.
Thanks for the detailed account for the adventure! I know this is from 16 years ago. Did the flex pipes hold up? I just spent 5 hours replacing my water heater, spending a significant amount of which sweating the solid pipes. Was wondering about the durability of flex pipes. Also, you didn’t have a sediment trap in the gas line. That’s required where I live.
They held up fine. I ended up replacing it in 2015 due to a renovation, so I got about 10 years out of the 9-year-warranty unit.
Hello Aren, thank you for documenting your water heater installation! I know this was from 2007 but I was wondering if you happen to know the model number of your GE water heater? I have the same unit installed at my residence and I am trying to troubleshoot an issue I am having so I have been scouring the internet using reverse image search and found your blog!
Sorry, we ditched it and switched to a tankless in 2015, so I have no more records on that old heater.